Enabling XMP within BIOS
XMP (Extreme Memory Profile) profiles are predefined, manufacturer-tested settings stored on your RAM that let it run at its advertised, higher speeds and optimised timings. By default RAM often runs at slower, standardised JEDEC speeds; enabling XMP unlocks the performance you paid for.
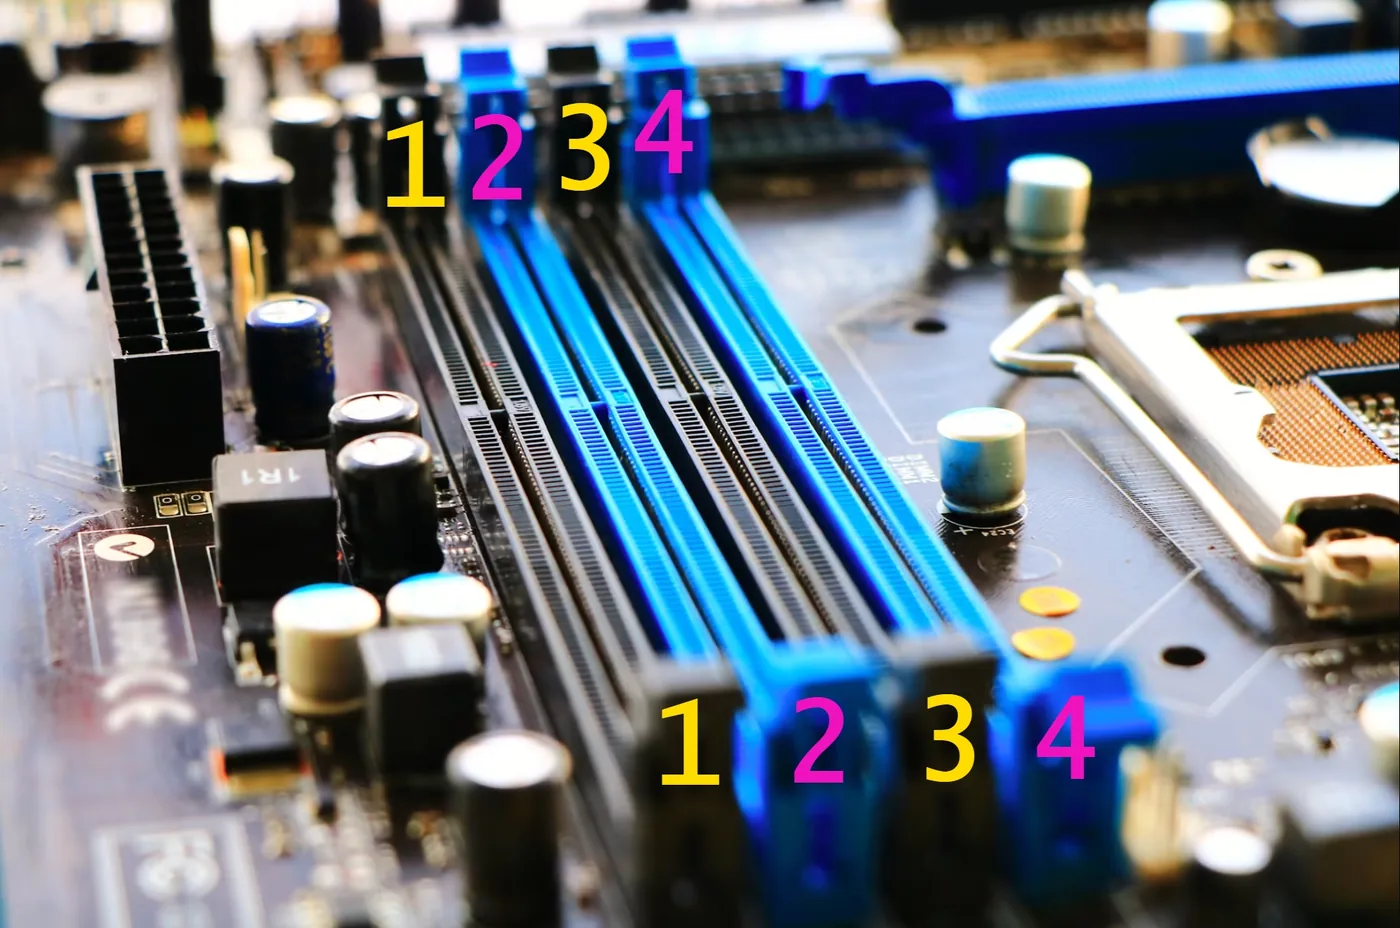
Tip: For best results with a two-stick kit, install your sticks in the recommended dual-channel slots, most often slots 2 & 4 (A2/B2). Always check your motherboard manual for the exact recommendation.
Warning: BIOS layouts vary by manufacturer. XMP may be named differently (DOCP or EXPO on AMD boards) or sit in a different menu. Use your eyes and look for the equivalent option for your specific BIOS.
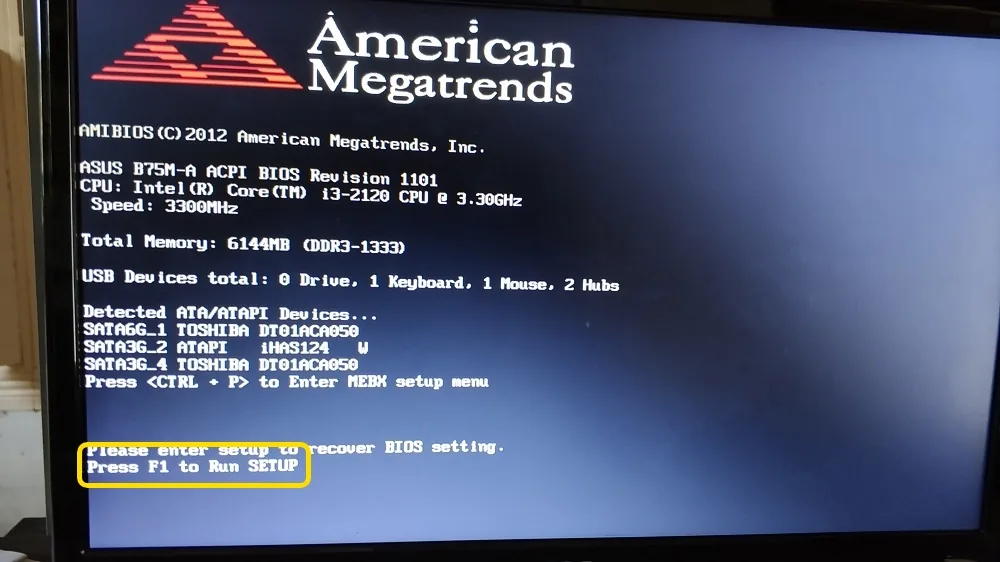
Enter your BIOS
Restart your system and on the post screen (before Windows loads) press F1, F2, F10, F12, DEL or ESC depending on your manufacturer. The post screen usually shows which key to use.
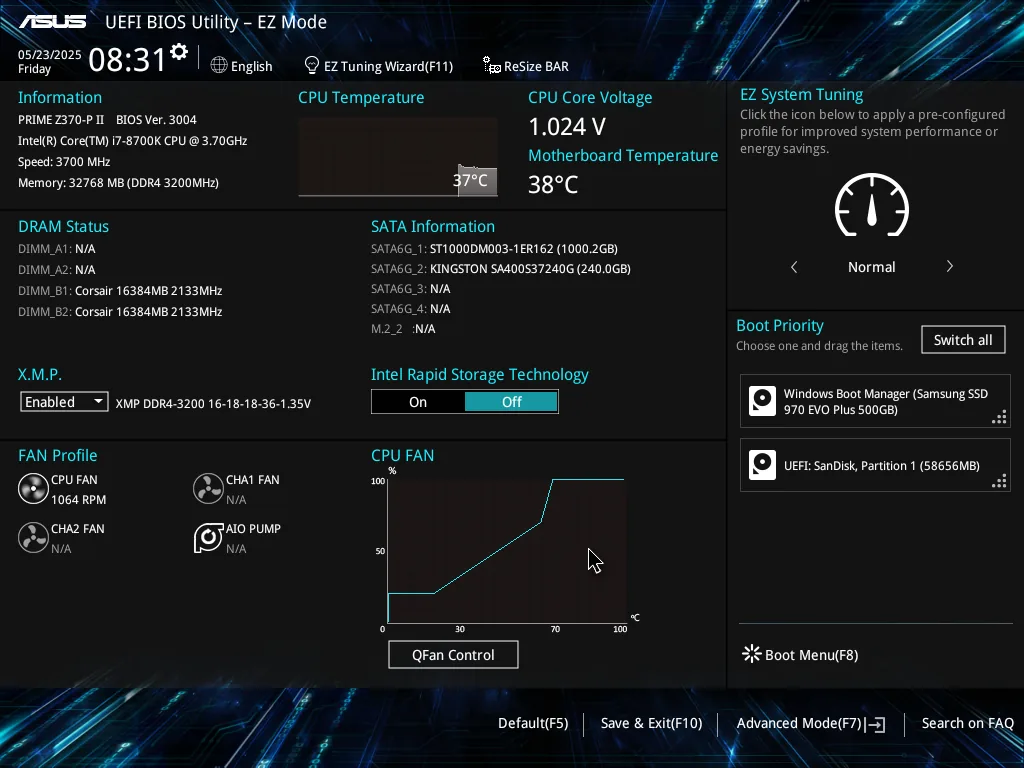
Find your BIOS home page
Your BIOS landing page will look broadly similar regardless of brand: different branding and layout, but comparable options.
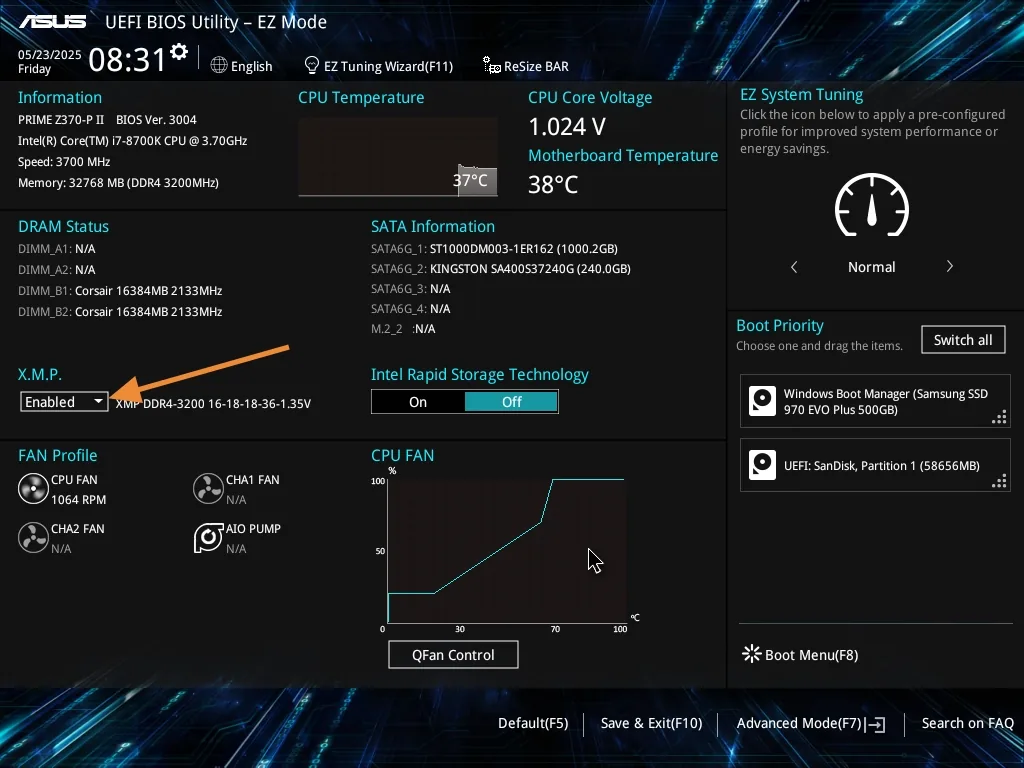
Locate the XMP option
XMP is usually exposed as a quick-access toggle right on the home / EZ page.
Enable the profile and save
Select your XMP (or DOCP / EXPO) profile, then save and exit. Your RAM now runs at its rated speed.